Creating a subscriber list in LeadsLeap is very easy, and is essential if you want to use the Autoresponder feature in the program.
Before starting, you have to join LeadsLeap (if you haven’t already done so). You can join the program using this link.
Once you have joined LeadsLeap, navigate to the user dashboard and look for the menu on the left of your screen. You need to locate the Email Marketing section:
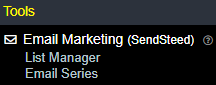
and then click on the List Manager prompt.
Once there, click on the ‘Add a new list’ button and give your new list a suitable name.
You then need to activate the list. To do this, click on the cog icon that you will find to the right of the list name:

There are several fields that you MUST fill in with accurate information, especially:
- your real name
- your email address
- your postal address
When you enter your email address, you will be asked to agree to an activation code being sent to the email:

You must click the button to get the code sent, then copy the code and paste it into the box below.
Most of the other fields can be left as they are, but you will want to change the ‘Email me’ selection so that you only get an email notification when someone verifies their email address (i.e. they really are interested in what you are offering):

After that, you only need to click the agreement and click on ‘Save and activate’.
You now have your very own subscriber list!
Note that if you are a free member of LeadsLeap you can have as many subscribers as you wish in a list (and you can have up to 10 lists), but you can only send each one a single ‘Welcome’ email when they first subscribe. If you are a Pro member you can also send an email sequence (called an Autoresponder) and there is no limit to the number of lists you can have.